Articles and Stories
Learning Theory
Equine Learning Theory uses science to tell us that learning happens most effectively with specific repetition. I am applying what I have learned from John Saint Ryan, based on studies done by the International Society for Equine Science, or ISES.
These studies have shown that learning is most effective when we consider the physiological aspects of how the brain functions. Optimal learning requires that the body work properly, which requires oxygen and glucose. The animal needs to be healthy, and to relax and breathe, in order to learn. Rest and relaxation are required for the blood to flow and deliver nutrients that will create new connections in the brain. This helps us understand why we must not ‘drill’ our horses—or ourselves—but instead to allow time for cognition.
We generally apply four basic types of conditioning to cultivate learning, and they are categorized as positive reinforcement, negative reinforcement, positive punishment, and negative punishment. As a horse trainer, while I must admit that I have on occasion resorted to punishment, it has generally been a mistake. We have found that horses learn best from either positive or negative reinforcement.
Positive reinforcement is when you add something to the equation to help facilitate learning. An obvious example of this is when you ask for a response, and deliver a treat when the desired response is performed. One can also offer touch as a motivation, such as a good wither scratch. “Clicker training” is a form of positive reinforcement where the animal is conditioned to respond to a sound that is associated with food and that becomes an effective motivation. While using food to reward the horse can be very helpful for overcoming fear based behavior, such as resistance to treatments from the vet or farrier, we must understand timing and delivery of the food to keep ourselves safe, and help the horse remain in a learning frame of mind.
Negative reinforcement is when something is removed from the equation to help facilitate learning. And example of this is when you apply your leg to the horse’s side, and he moves forward, and you take your leg away. Most of the methods used to train horses fall into this category.
A word on negative reinforcement:
Negative is not ‘bad’, it is the concept of removing as opposed to adding. However, we generally apply something that can then be removed in order to condition a response. Adding a cue, or ‘pressure’, from a bit, your leg, a halter, or a whip, as a signal, is only as humane as the person applying the cue. The initial cue is not an irritant, but sometimes we must increase the ‘pressure’ for the cue to be understood. However, it is important to remember that the goal is to be able to apply a very mild, ‘light’ cue, and to be understood. If we are helping our horses learn, we will find that we need to apply less and less pressure with. each set of repetitions. If our horse’s understanding is not improving, and we find that we must continue to increase our pressure, then it is important to reconsider our approach. Perhaps we need to revisit the exercise after a short break, or get the assistance of a more experienced equestrian. Some persistence is important, but safety of horse and rider is paramount.
Positive punishment is when you add something to the equation to discourage a behavior. An example of this is tapping a horse with a whip when he tries to kick at you. This is a very tricky thing to negotiate, as it quickly becomes abusive. There is a time and a place for punishment, but it must be carefully doled out by someone with a good understanding of feel, timing, and equine behavior.
Negative punishment is when you remove something from the equation in order to facilitate learning. An example of this would be to withhold food from a horse that is pinning its ears. Again, it requires a good understanding of equine behavior, feel, and timing, to accomplish this, and it can be potentially dangerous if the horse decides to act out as a result of the punishment.
I do not recommend that an amateur resort to any kind of punishment unless they are under the direction of a competent trainer. It is unfortunately common for people to anthropomorphize horses and attribute their undesirable behavior to willful disobedience. Horses are generally motivated by baser instincts than people, and are not deserving of punishment for their instinctive responses to stimulus.
When teaching a new behavior, we like to offer five to seven repetitions, depending on our success. Once a behavior has been established, we can reduce the repetitions to three to five, depending on the response we receive. Applying three sets of three repetitions can be very effective to condition desired behaviors. If I am getting the response I want, I will move on the next exercise after three repetitions. If I would like to see further refinement, I will ask for additional repetitions, up to five, before allowing a rest. I often find that after a one minute break, my horse will perform the following set much more easily.
For example, if I ask the horse to lower his head by putting pressure on his poll using the halter, and he does so, I will release the pressure, and give him a reward. I will do this three times in succession. Ideally, I’d give him a breather for 45-60 seconds, and then I’d ask for three more repetitions. Each set of three repetitions is followed by a 45-60 second break.
Once I get the response I want with a light application of pressure, I can move on to another exercise, which I will again repeat three times, three repetitions, three sets of three.
Ideally, with each exercise, we perform three repetitions, with the hope that each time we ask, we receive the desired response after less pressure is applied. It will help to compare each set, in the hope that the final set is performed with a lighter touch and faster response than the first.
I have only recently developed an intellectual understanding of Equine Learning Theory, and it has dramatically changed my training practices. The techniques I use have not changed, but the way in which I apply my aids has become more methodical, and as a result, the horses I train seem to have a better understanding of what i am asking. They appear to learn faster, retain the information more reliably, and exhibit less stress and confusion as we work.
Anyone can learn how to do this with dedication and practice, it is more scientific and concrete that the more esoteric concepts of feel and timing. Learning horsemanship is a lifelong journey, and there is no ceiling. We can continue to improve as long as we are willing to learn.
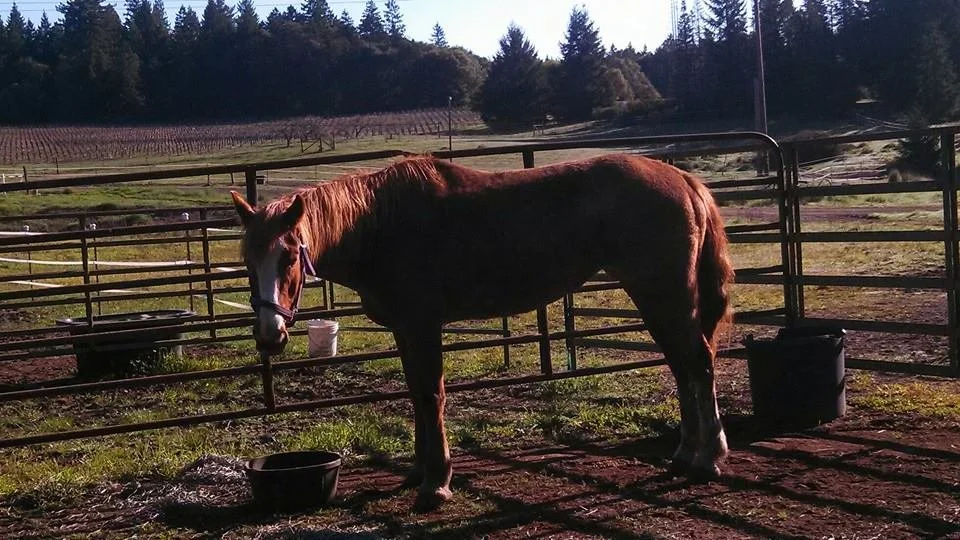
Shelby upon rescue
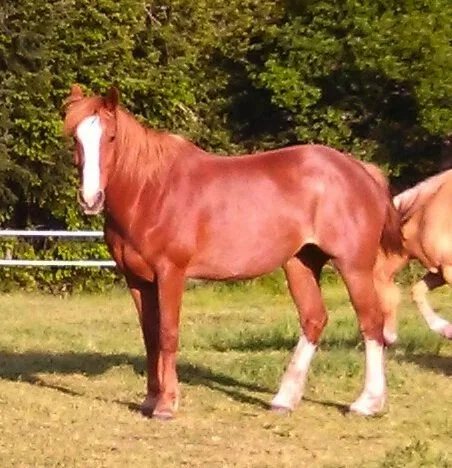
Shelby Glow-up
Helping a Needy Horse
For more information on our 501c3 non-profit horse rescue,
go to Horse ReCourse.
~1st: Get a veterinary exam, and follow the veterinarian’s recommendations. Ask about a dental work, deworming protocol, diagnostic blood work, recommended diet, and vaccines.
~Get the hooves trimmed properly
~Free feed grass hay
~Start slow with small amounts, and gradually work up to several pounds of concentrated feed with supplements, fed on a daily basis. Keep in mind, a healthy horse’s stomach can't hold more than 6 pounds of feed at a time, and a compromised horse can handle much less.
My recipe:
*1pound or more soaked hay pellets (alfalfa or timothy are ideal)
*1pound or more soaked beet pulp
*1pound or more rice bran
*1 cup or more corn oil
*California trace mineral supplement
*Flax (I like Omega Horseshine supplement)
*Time and Patience!
I hear quite a few people refer to their animals as “Rescues”, and the term can be loaded with inferred meanings. I think that the general implication is that the animal was not doing well in it’s former home, and the person who has recently taken responsibility of the animal has had to spend a lot of time and money on its care.
With horses, it’s challenging to find a way to help those in need. They are big, expensive, often misunderstood, and can be dangerous. Unwanted dogs and cats can be easily kenneled and managed by the authorities, but things get much more complicated with horses, since they require more space and skill to keep. As someone with the skills and experience to help horses in need, I have often wished for the resources to accommodate them all. Thankfully, I have been able to make a difference in the lives of many horses over the years.
Shelby was one example of a horse that had been misunderstood, and become dangerous to handle and ride. As a result, she had not received routine care in many years, and was a physical wreck. Her discomfort only made her more cranky and difficult to handle. Because of her age, she was not an easy horse to place in anew home, as most people with horsemanship skills want a young horse that can be ridden harder and for a longer time. People tend to be unwilling to invest in caring for a horse they can’t use.
I had known Shelby when she was young. She had been a very athletic mustang, and was well started. She showed potential for performance disciplines, and had an amazing, well balanced canter. The man who had bought her and paid for her to be started had never had horses before, and did not understand the challenges he faced as an amateur rider. I had concerns for Shelby’s well being even then, but there was no reasoning with her owner, he was determined to keep the horse, and confident in his ability to learn to ride her.
More than a decade later, I became aware of Shelby and her two pasture mates being given away to a locally known, disreputable horse trader. I reached out to him, saying that I was familiar with the horses, and I would take them off of his hands. After about a month, he realized that the skinny horses were worthless, and he allowed me to come pick them up.
I spent several months nursing the horses back into good health. My feeding program for malnourished horses includes free choice grass hay, a daily ration of beet pulp, alfalfa pellets, rice bran, corn oil, and trace minerals. I had their teeth floated, hooves trimmed, tested and treated their worm load, and made sure they were vaccinated. Aside from getting them the care they needed, which was a challenge, I left them alone to rehabilitate before asking them to engage with me.
Once the horses felt healthy and strong, I slowly started in hand work to get them stronger, more supple, and obedient. After several weeks in hand, I started riding Shelby. I remember her lovely canter, how she used to float around the ring. Shelby had other memories, certainly. She was having none of it. Having been through many years of neglect and abuse, she had no use for humans, and certainly did not want to carry anyone around. She would rear, buck, spin, lay down, anything to express her disinterest in being ridden. After several months, Shelby and I reached an agreement, and she would consent to trail rides. She had no interest in performing in the arena, or allowing her rider to dictate much of anything.
As much as I wished I could keep Shelby for the rest of her life, I couldn’t afford to have these three rescued horses indefinitely. I found a sanctuary for the oldest horse, and found an adopter for the younger, gentle gelding. But Shelby was a challenge, because she wasn’t easy to be around, and she was unwilling to work for a living.
I found people who thought they wanted Shelby, but after a few weeks or months, she would boomerang back to me. Our understanding was not transferable to other humans. Eventually, I found a sanctuary in the desert, where Shelby could live out her days the way she began her life, roaming free in a herd on the sand.
I think about her more than any other horse that has come through my hands, because she had so much potential, and she was so valued, until she wasn’t. So many horses in America suffer like this, racehorses, show horses, mustangs, it doesn’t matter where they begin their lives, or how much the stud fee or sale price was, once a horse falls through the cracks and loses their ability to comply with the humans’ demands, they become a liability.
Without a demand for horse meat in this country, these horses don’t even have value by the pound until they are shipped across the border. Their final days are spent hungry thirsty, scared, and in pain, as they are crammed into trucks and transported to distant slaughterhouses.
We don’t have a good solution for unwanted horses, so the best thing we can do is to keep horses from becoming unwanted. Keep them healthy and sound, train them to be good citizens, and they will be valued, and can enjoy a long and pleasant life. Once a horse starts displaying dangerous or unwanted behavior, unless it can be addressed properly, their happy days are numbered.
If you are interested in doing more for horses in need, ask your local veterinarians about organizations in your area, and volunteer with them. If you are taking in a neglected horse, be aware that they may have infectious diseases, and be sure to quarantine them. Follow your vets’ recommendations on how to keep from infecting other horses.

Groundwork
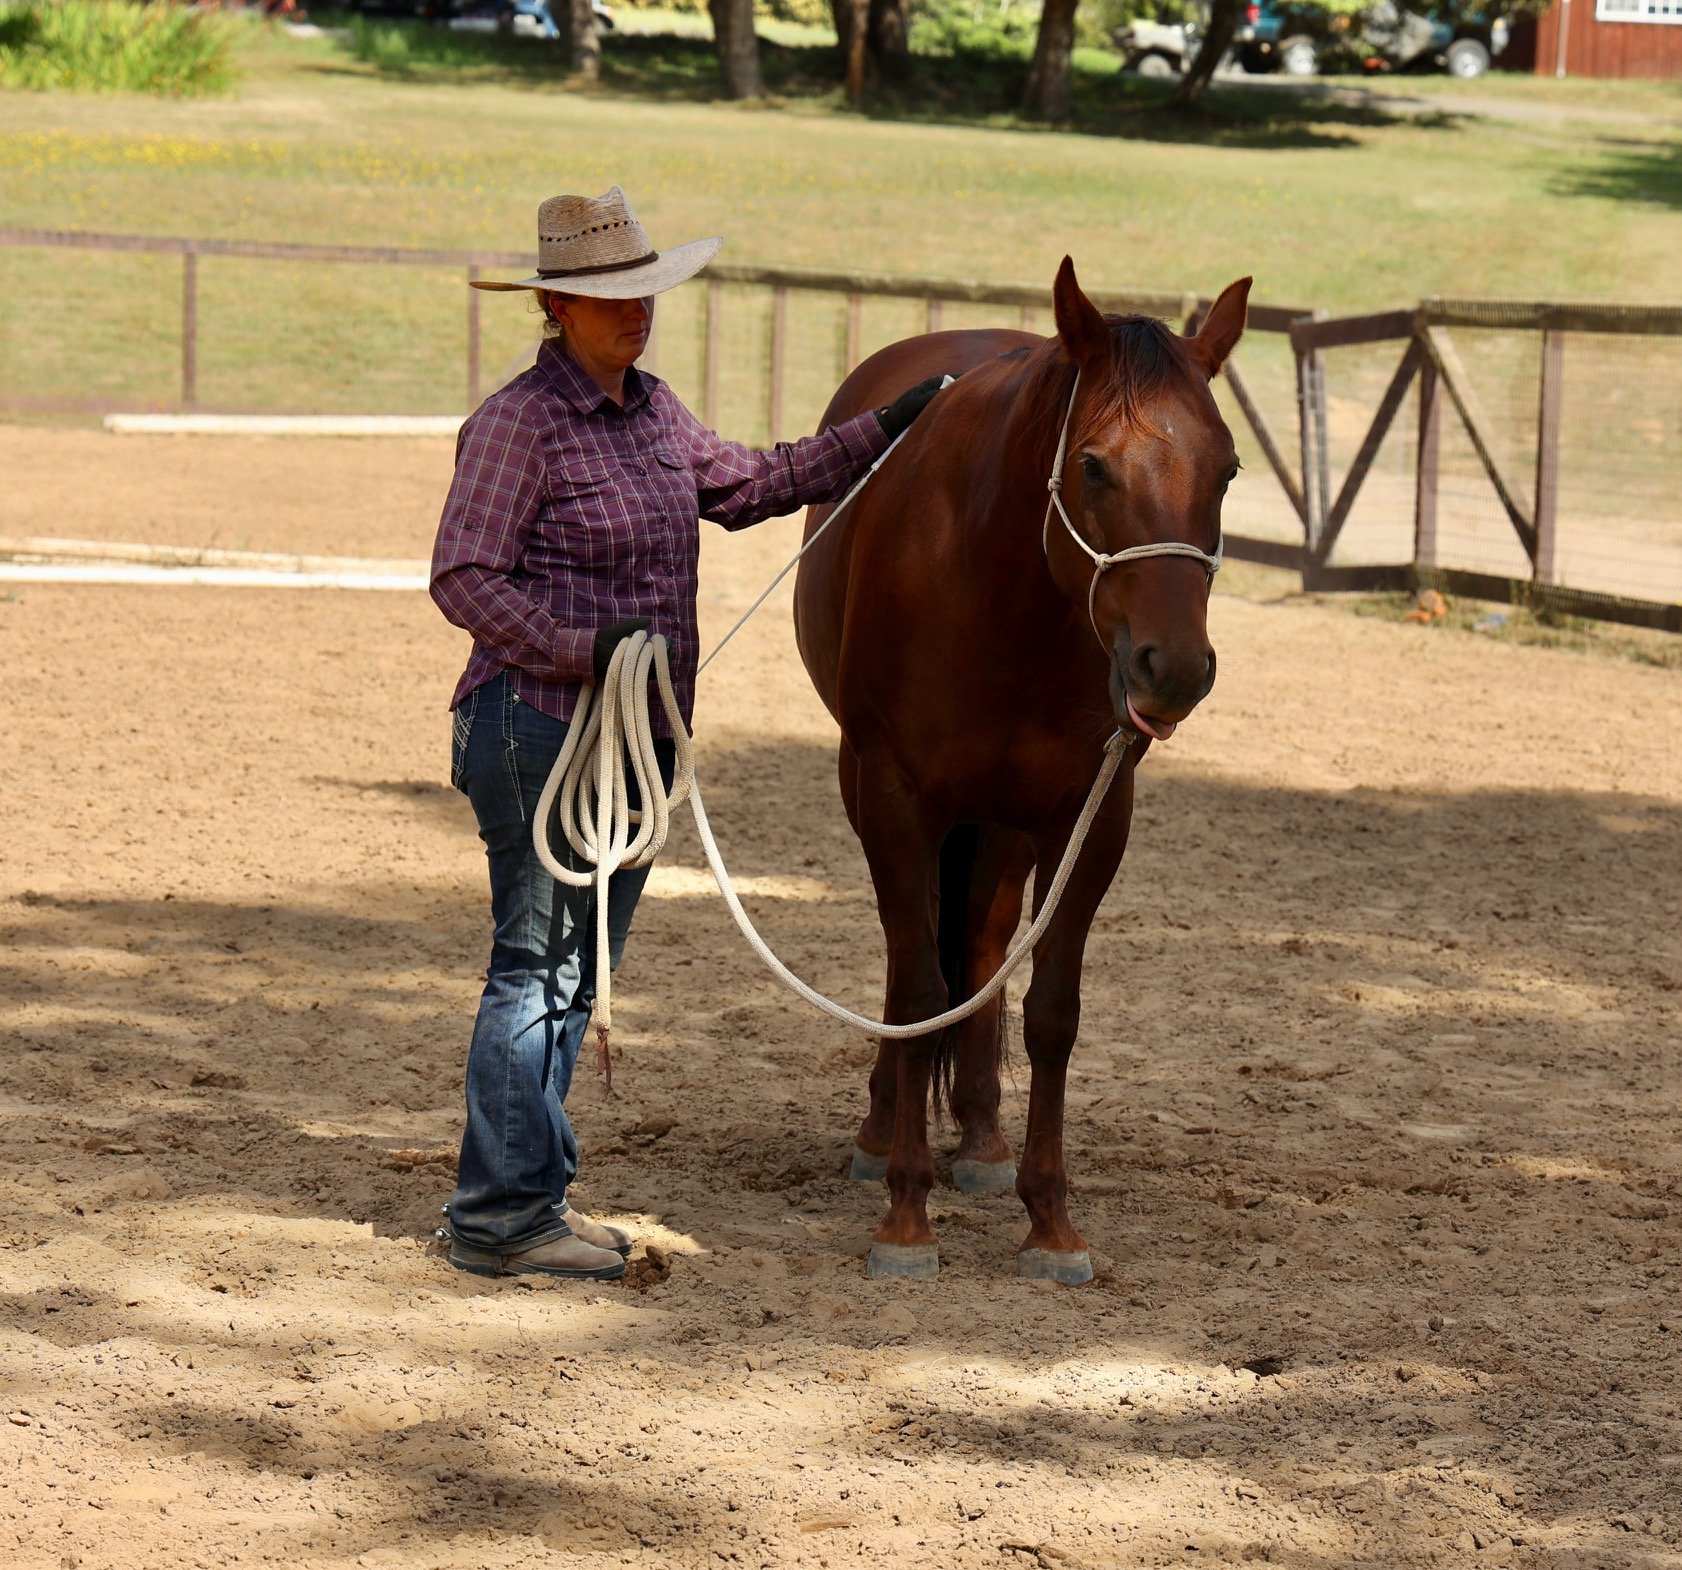
Groundwork has, fortunately, become more popular and common in the past decade or so, and for good reason. Preparing your horse from the ground can make work under saddle so much easier for both you and your horse. I start every horse I meet on the ground, and rarely will I get on any horse without a few minutes together ‘in hand’. After decades of experience, I can assure you, it’s just a safer way to get to know each other. You’d want to know someone before heading off somewhere together, wouldn’t you?
The goal of groundwork is to establish some mutual understanding of the cues I’ll use when I am riding. I can figure out a lot of what a horse will feel like under saddle before I ever get on. Ideally, I’ll start in a rope halter with a 12 foot lead rope, preferable one made with ‘yacht-braid’ rope, without a snap—the rope is attached directly to the halter. I’ll use a dressage whip or similar stick, so I can touch the horse from a distance. If at all possible, I like to be in a round pen, or similar small enclosed area, with good footing, but I’ll take what I can get. If I am getting on in a parking lot, next to a trailer, and I don’t have a stick, I can still get something accomplished.
The first thing I want to do is to make sure the horse isn’t afraid of me and my equipment. We’re going to assume he isn’t afraid of the halter—if so, we have quite a few days’ (or weeks, or months!) of work ahead of us before we’ll go on a ride. But can I swing the lead rope near by? If not, I’ll do some swinging of the rope without approaching the horse, then touch the horse with the rope, and see if I can get the horse to relax, and not be fearful of the rope before I proceed. I’ll do the same thing with the stick. I want to be able to touch the horse calmly with the equipment, stroke him with it, and get some relaxation, and also move the equipment in a rhythmic motion near him (but not ‘at’ him) before asking anything of him. I want to be sure the horse isn’t reactive or fearful of me or my equipment before I ask him to think and learn. I am using the equipment to help me reach the horse from a distance, and direct his movement, so we stay together. If the horse is fearful of me or the tools I use, there is no benefit to asking anything of him.
Provided the horse is not afraid of me or my equipment, I will start by asking him to give to pressure on his head, using the halter. If I pull down on the lead rope, exerting pressure on his poll, how much pressure does it take before he lowers his head? If I repeat this several times, can I halve that pressure? I will apply pressure steadily, and with gradually increasing force, until I get a response, at which point I will immediately release all pressure, and reward with some meaningful touching, or possibly a marker and food, if warranted.
A note on pressure, and meaningful touch: the touch that intrinsically feels best to horses is to rub them (not pat them) in front of the withers. This is very similar to what horses do to each other when they stand head to tail and mutually groom each other. It just naturally feels good to them, the way a shoulder rub feels good to most people. If a horse is not immediately ‘into’ this, I will just stand and rub him for a few minutes when I meet him, and try to make friends with him before I ever ask him to do anything. I might find that the horse has an itchy spot somewhere that he wants me to scratch. If the withers aren’t getting a good reaction, sometimes the chest, neck, or belly can be good spots to try.
If I am with a really fearful horse, I will spend a few sessions just doing this stuff, and feeding him treats. Feeding treats can create problems with aggression in many horses, so it’s important to do this carefully. It can be very helpful to use food as a reward for fearful horses, but one needs to understand positive reinforcement techniques in order to do this safely. While there is a place for using treats as positive reinforcement, I don’t want to include treats with basic groundwork, so that will be a separate article.
The point here is that you want to be sure that you can offer a horse a reward by touching him in a meaningful way, and if you can’t, you need to go back a few steps until you have something to offer him. Our work with our horses cannot be all about pressure and release (negative reinforcement), there has to be some reason for your horse to want to be with you and please you. Ideally, we have more to offer than just being a good source of food, although that can be a good starting point.
Everything we introduce to the horse relates to feel. Feeling of your horse, and your horse feeling of you, has more to do with how things are done than what is being done. In each exercise, I notice how it feels, how the horse’s expression is, and what this tells me about the horse’s state of mind. The exercises I introduce to the horse will help me evaluate the horse, and help the horse understand what I expect of him, but they are of little value without feel. And feel is something that I must offer the horse before I can expect to receive anything of value from him. Feel and contact are related, and the better quality feel you have in-hand, the better your horse will feel under saddle.
I will begin with introducing feel by using the pressure of my hand on the halter rope to move the horse’s head up and down. I will release the pressure (negative reinforcement, or R-), and give a rewarding touch (positive reinforcement, or R+) when the horse responds appropriately. I will release within a second of the correct response, so the horse can associate the release of pressure or reward with the behavior I want.
I want to be able to move the horse’s head up and down, and to move all four feet forward and back, left and right. I want to be able to do this with a very light touch, a light feel of the horse. This is where the concept of pressure and release, or negative reinforcement, come into play. I will apply pressure upon the horse, and when I get the correct response, I will release the pressure. There are two important components for the human to grasp, first, to understand the correct application of the command, and second, to understand the timing.
The better your timing in applying and releasing pressure, the better your horse will feel. This is something that will continue to develop over your lifetime, so try not to be too hard on yourself at first, but strive to release your pressure within a second of the correct response in order for the horse to learn to respond appropriately.
The next exercise, after asking the horse to raise and lower their head, is to ask the horse to step back when pressure is applied to their nose. I will hold the halter by the fiador knot under the jaw, and bring my hand back towards the horse’s chest to apply pressure to the nose. Again, we are asking with the minimal amount of pressure possible, increasing the pressure until we get the desired the response, and releasing by removing the pressure within a second after the horse takes a step backwards, or even thinks about moving his feet in the right direction. Our goal is to get several steps backwards with a light touch, although the duration, or amount of response necessary for success will vary with each individual. Once we can get the desired response, we can expand upon this, refining our request by asking from a distance, by using a bit instead of the halter, or by applying a vocal cue.
The following exercise is to ask the horse to step forward with a steady pull forward on the lead rope, which will apply pressure again on the poll. The horse can differentiate between a downward and a forward pull. We ask for a step at a time at first, in every direction, with a release and reward after each effort. We can build on this over time, so that the horse can transition from going backwards to trotting forwards with a very light cue.
We then begin using the stick. The halter, pressure on the head, is a ‘leading aid’, which corresponds to the bit and reins when we ride. The stick is a ‘driving aid’, and corresponds to our legs when we ride. We can apply the stick in a light tapping motion to the area on the horse’s side where our legs will be when we are riding. The tapping is rhythmic, and very light initially, and if the horse does not respond, within a second, we can apply a slightly firmer tap, in rhythm, increasing intensity gradually until we get the desired response. Once the horse takes a step, the tapping stops, and this release of pressure is the reward. If the horse seems unclear, assisting with pressure upon the poll with the halter can be helpful. A reward of rubbing the horse in front of the withers once he responds correctly can be effective. It’s important to initiate each request with the lightest cue possible, and gradually increase pressure in a reliably consistent way. Just because we needed a firmer tap the last time, we do not want to assume we will need such a demanding cue on the next repetition. We are helping the horse learn to respond to the lightest cue possible. Each subsequent increase in pressure is a correction, used to reinforce the original light cue.
I subsequently ask for the horse to yield his hindquarters laterally, that is, to turn his body as though he were a wheelbarrow, by moving his hind legs over. We again use the stick, in the same manner as before, but further back on the horse’s side. If the horse is very unclear about this cue, we can begin by tapping him on his hindquarters. Again, we tap with increasing pressure, in a rhythmic manner, a second apart, increasing the pressure gradually. Once the horse responds by moving his hindquarters away from the pressure, he receives a release, and is rewarded. As the horse becomes more clear in his understanding of this cue, it can be administered further forward, so that the difference between the cue that asks him to go forward, and the cue asking him to move laterally, are only a few inches apart. Imagine riding and applying subtle cues from the saddle, and where you’d want your leg to be.
Once I have seen that the horse can move forwards and backwards, lower and raise his head, and move his hindquarters left and right, all without undue pressure from the halter or the stick, I feel confident that he will respond to my rein and leg aids under saddle. It is only then that I feel confident getting on and riding. With a well trained horse, this process will only take a few minutes. With a young, green horse, this can take weeks or months, depending on the horse’s receptivity to the human and learning, and the rider’s level of skill.
When I am riding a horse regularly, I do not feel the need to go through all of these exercises every day. Once I have established a mutual understanding and basic obedience, I can determine much of this during my walk with my horse from the paddock to the grooming area, or from the grooming area to the arena, without doing much besides opening gates and changing direction. If I find myself struggling with my horse at any point, I always come back to these basic exercises, and I can find the source of our issues.
I like to ensure that I am working from both sides of the horse for an equal duration of time. Because we spend so much time on the near (left) side, I try to remember to initiate my work from the off (right) side as often as possible to offset our natural tendencies, and help the horse be as ambidextrous as possible.
As my communication with a horse develops, I can add to the repertoire by sending the horse around me and over obstacles at all three gaits, and asking for these movements at a greater distance from me. I can use visual and verbal aids to stand in for the tactile cues, such as my voice, my position, the rope, and the stick, and work towards developing these movements at liberty. But without the understanding of the basic movements outlined above, nothing else I ask my horse to do will work out quite as well as it could. If you can get your horse to perform these movements with very light aids, it will improve al of your work under saddle, and keep your horse safe and happy with every handler.

Bits and other Training Headgear
Over the decades that I have been working with horses, I have developed my own philosophy on how to select the headgear I use on each horse. Some of what I know is based on commonly accepted information, conventional wisdom, physics, and an understanding of the physiology and conformation of the animal, and some of what I will share is based upon my own personal experience. I will do my best to clarify the source of the information that I am sharing.
Historically, we have developed horsemanship that uses the reins in the rider’s (or driver’s) hands to communicate with the horse, along with seat, leg, and vocal cues. The reins communicate with the horse via a bit in the mouth, or straps around the horse’s head. I am not, here in this article, going to discuss alternatives to using the reins to control the horse, but suffice it to say that it is entirely possible to condition a horse to respond to aids other than the reins.
Different horses prefer different mouthpieces, and an accomplished equestrian can determine what will work best for each individual through a process of trial and error, an oral examination, and observations of the horse while it is in work. The horse’s mouth and nose are sensitive areas, and a person can exert a painful amount of pressure on the horse, often unintentionally. It is important to get professional help if one is unable to determine how to work the horse in a relaxed and comfortable manner.
Most people ride and drive horses with a metal bit in their mouth. There are many varieties of bits to choose from, with the basic types of bits being snaffles, which are the simplest, working without leverage, curb bits, which exert pressure upon the chin as well as the mouth, and gag bits, which exert pressure upon the poll, as well as the mouth. There are also several types of bridles made without a mouthpiece, commonly grouped together as ‘hackamores’, and we will go into this later. Modern mouthpieces are made with metal alloys specifically designed to encourage the horse to salivate, as we prefer that a horse’s mouth is wet when wearing a bit. There are also bits made of leather, plastic, rubber, and other materials that will work well for some horses, but the vast majority of people use metal bits.
The differences between snaffles, curb bits, and gag bits relate to the mechanism with which the reins attach to the bridle, and how the bit moves to exert pressure upon the horse’s head and jaw. The mouthpieces of the various bits can be the same or very similar, it is the shank, or outer part of the bit that connects the reins, headstall, and mouthpiece to each other that determine the type of bit. It is common to refer to a jointed curb bit as a snaffle, and that is incorrect. A true snaffle has no leverage, regardless of the number of joints in the mouthpiece.
A snaffle consists of the mouthpiece, with a ring on each end to which the reins and the headstall both attach. The mouthpiece can vary in every way imaginable, it can be one, two, or more pieces, with joints allowing each side to move independently. The rings can be fixed, and of various shapes, such as an eggbutt, D ring, full cheek, or loose, in which case they are generally round, or ‘O’ ring. When pressure is exerted upon the reins, the bit will apply force to the bars of the mouth (the gums, essentially), lips, and the tongue. The degree to which pressure is applied to the various parts of the horse’s mouth has to do with the construction and shape of the bit. A mouthpiece with a wider diameter will exert pressure over a broader area than one with a thinner diameter. Imagine the difference of carrying a heavy bag with thin straps versus thick, padded straps. The texture of the mouthpiece will affect the horse’s level of comfort, as well, with a smooth mouthpiece being the mildest. One can imagine grasping the mouthpiece and making a fist, or even hanging from this to do a pull up, and how comfortable that may or may not be.
A curb bit may have any variety of mouthpiece, same as the snaffle, but the cheeks will have leverage by having separate attachments for the headstall, reins, and curb strap. When pressure is exerted on the reins, the cheek will move in such a way that force is applied upon the bars, lips, tongue, chin, and poll. If the bit has a high port mouthpiece, pressure may also be applied to the roof of the horse’s mouth. Generally, the longer shanks are more severe, and the thinner mouthpieces have more bite to them, same as a snaffle. A thin curb chain will be more painful to the horse than a wide, soft curb strap. A solid mouthpiece allows a horse more freedom for his tongue than a broken mouthpiece, which will conform to the tongue.
A curb bit with a mullen mouthpiece will relieve the tongue, avoid the roof of the mouth, and apply pressure only on the bars, lips, and chin. It is my opinion that a straight bar, mullen mouthpiece is the mildest form of a leverage (curb) bit.
The ‘cowboy snaffle’ is not actually a snaffle at all, but a jointed pelham, and does not offer a horse any relief, as it compresses the mouth from every point of pressure. In my opinion, this bit is much more severe and confusing to a horse than either a snaffle or a straight bar curb.
There are modern bits made with joints that allow independent movement of both sides of the bit without allowing them to collapse, break over, and pinch, and there bits seem to be much milder than the old fashioned ‘cowboy snaffle’ or ‘Tom Thumb’ type bits.
A gag bit has the same variety of options for the mouthpiece, but the way in which the mouthpiece attaches to the rings or shanks allows for more movement. Because of this, a gag bit allows the rider to exert pressure upon the horse’s poll, and applies more pressure to the horse’s lips than the bars or tongue, because the bit is drawn towards the poll when the reins are pulled. A gag bit can be made like a snaffle, with rings instead of a shank, or with a shank, giving the bit more leverage. Some bits combine the gag action with a curb bit, placing pressure on many places all at once. These types of bits are used for maximum control, and are seen most commonly in high speed sports, such as barrel racing, high level jumping or cross country, or polo. There is some argument made that with more points of pressure, the amount of pressure to any one point is diminished, but there is also the understanding that these bits can apply an extreme amount of pressure to many parts of the horse’s head and face.
One would hope that the vast majority of amateur riders would use a snaffle bit, as it is by far the mildest, least painful bit for the horse. In my opinion, it is much easier to cause the horse pain with a leverage bit, such as a gag or curb bit. One must be a reasonably proficient rider, with a good understanding of the rein aids, decent equitation, and an independent seat to begin to use a leverage bit properly. A mild snaffle bit is more forgiving of a rider’s mistakes.
Classical equitation dictates that young horses are started in a snaffle, and spend many months or years developing their minds and bodies before advancing to a curb bit. The curb bit is employed only after the horse has developed the ability to collect itself and use it’s body properly, and it is introduced carefully by a proficient rider. Although many people will use a bit with leverage to offer a rider more control of an unruly horse, this is no replacement for good training. Any horse should respond well to a snaffle bit before being ridden in anything stronger than that. A rider should understand how to ride in a snaffle before transitioning to a stronger bit. Regardless of how much pain a rider inflicts upon a horse, no equipment will keep a human from getting hurt by a horse they struggle to control.
My experience as a trainer of young horses and novice riders has led me to believe that the snaffle is typically the best choice for everyone. There are many options available without venturing beyond the snaffle bit. The simplest, commonly available bit is the two piece eggbutt snaffle. It is a mild bit, without sharp edges or the potential to pinch the horse’s lips or tongue. The average horse will do fine in a five inch wide eggbutt snaffle that is about 12-16 mm in diameter. This is the bit that I will start most young horses in, and their response to the bit will dictate what adjustments I choose to make, over time. If your horse has an extremely wide or narrow muzzle, you might want to measure and see if you need a bit that is not the common five inch width.
Some aspects to consider when changing bits are the horse’s natural body carriage, level of responsiveness to the rein aids, and the rider’s ability to communicate to the horse. In my experience, a horse that tends to be “bracey”, inverted, and resistant may prefer more tongue pressure to bar pressure (a bit with two or more joints), and a horse that prefers to over flex and get behind the bit may benefit from more bar pressure and less tongue pressure (a single jointed, mullen mouth, or ported bit).
A fixed ring snaffle will hang in a steady place in relation to the headstall, whereas the mouthpiece of a loose ring snaffle will always fall towards the ground. Based on my experience, I will use a loose ring, double jointed snaffle, which will offer the horse more tongue than bar pressure, and fall towards the ground, when I have a horse that I’d like to see bring it’s head down, soften the bottom of it’s neck, and close it’s throatlatch. I’ll use a fixed ring, two piece or mullen shaped snaffle, offering more tongue relief, when I have a horse that I’d like to see reach it’s nose out, open it’s throatlatch, and accept more contact. These are examples of how I will start to consider changing my tack to help the horse learn to carry himself properly, and respond to subtle rein aids.
If I have a horse that seems reluctant to accept contact, I’ll find a bit that is thicker in diameter, and therefore more forgiving and potentially appealing to the horse. I can try a hollow mouth bit, which will be lightweight, or a heavier, solid bit, depending on what the horse seems to prefer. Sometimes I will move away from a metal bit, and try a synthetic material, or even leather, to entice the horse to accept the feel of the bit in its mouth.
If I have a horse that is very heavy in my hands, I’ll use a thinner bit, in hopes that he’ll be less inclined to lean on it. Some people will choose a bit with a twist in it for an exceptionally heavy, strong horse, to offer the rider more control. I usually look for exercises to help the horse and rider understand contact before going this route, as I hate to callous a horse’s mouth with a more severe mouthpiece if it can be avoided. Sometimes a bit with a mild mouthpiece but some gag-type leverage can be helpful for riders who struggle with very strong horses, but again, I will try everything I can think of to help horse and rider understand one another before going this route.
Each individual horse has their own personal preferences, and sometimes it takes awhile to figure out which mouthpiece is most comfortable for an individual. I’ve found some horses prefer heavier mouthpieces, some prefer something more lightweight. Some prefer a bit with lots of ‘play’, and some prefer a bit that sits very still. Their are hollow mouthpieces, different alloys, weighted rings, and many other options to try. It’s helpful if you can borrow different bits and try them before committing to any one thing since there are so many modern options available to us now. I like to give a horse several rides with a new bit before making a decision, sort of like breaking in a new pair of shoes. Most trainers I know have heavy boxes full of bits! You never know what might be useful, and after riding many different horses, sometimes we can apply what worked for one horse to another that feels similar.
When having a horse’s teeth floated, it’s good to get a thorough oral exam, and have your vet explain your horse’s mouth to you. The mouth conformation varies with each individual, some horse’s have fatter tongues, lower pallets, or a lack of symmetry, all of which can help explain what it is that will make them comfortable. Before asking any horse to carry a bit, I always make sure to have an oral exam done, under sedation, by a qualified professional, and allow them to administer any necessary dental care. No horse will be comfortable if their mouth is out of whack.
Regardless of what you can see, there’s no accounting for taste. Some horses will prefer the feel of one bit over another for no apparent reason. Just like some people are ticklish, and some people don’t like vigorous massage, each horse will want something different in their mouth. Some horses prefer tongue pressure, some prefer tongue relief. There are a few horses that never seem to get used to any bit whatsoever, and for those horses, I like to examine the bitless options.
The American term ‘hackamore’ is derived from the Spanish word, ‘jaquima’, and refers to what we now call a bosal. A bosal is a handmade, braided leather noseband designed to be used in the training of a ‘bridle horse’. A quality bosal is a work of art, and requires special care. This is truly a piece of equipment in which you get what you pay for, and a cheap bosal is pretty worthless. Riding in a bosal is very different than riding in a snaffle, as there is minimal contact on the reins. The bosal puts pressure upon the nose and jaw, and it has been suggested that the bosal was historically used on young horses that would have been uncomfortable wearing a bit as their teeth were maturing, before equine dentistry was common. Typically, the bosal was used on young horses after they’d been started in a snaffle, and helped transition a horse to the ‘bridle’, or curb bit. Now we have many different types of bridles, and the term “bridle” tends to refer to whatever it is that we put on our horses’ heads, not just the spade curb bit used by the Californio riders of Spanish controlled California.
The mechanical hackamore is a modern contraption that operates much like the curb bit, with a shank and a curb strap. It applies leverage to the nose, chin, and poll, and some of these can be quite severe. There have even been accounts of horse’s noses being broken, or the cartilage irrevocably damaged, by poor usage of a mechanical hackamore. Depending on how they are made, hackamores can vary in their severity. Typically the longer shanks create more leverage, same as with curb bits. A broader strap across the nose distributes the pressure over a larger area, and a thin, hard rope would have more ‘bite’ to it. The strap under the chin can be a thin hard chain or a wide soft strap, as well, and it seems intuitive to imagine that a soft, wide strap would be more comfortable. Some mechanical hackamores have a simple design, and less leverage, and some are far more ‘mechanical’ and complicated in nature.
A sidepull is essentially the same as a halter or cavesson, just a strap across the nose with rings on either side for the reins, and attached to the head over the poll. A ‘jumping hackamore’ is a similar construction. These are very mild, and really cannot inflict any pain upon the horse whatsoever. Some horses can become very bracey, and push into their noses, a posture that is not generally helpful for riders. However, this is a great option for new riders, children, and very gentle, safe horses. The action on the sidepulls is limited, and it can be difficult to achieve much refinement in a horse using this equipment.
There is a fairly modern piece of equipment, popularized by Dr. Robert Cook, called a bitless bridle. It is similar to a sidepull, except that the reins attach to straps that cross under the horse’s jaw, and apply pressure around the head. A rider could potentially put quite a bit of pressure upon the horse’s head at various points. The idea behind this bridle is that the pressure applies to specific places upon the horse’s head, and so contact can be similar to a snaffle. The feel in the rider’s hands is more like a snaffle than most other bitless options. In my experience, some horses are very happy in these bridles, and some are not. I do not think that it is much more humane than a snaffle, as I believe many of its proponents do. It is just a very different application of the pressure from the reins upon the horse’s face, and some horses and riders will prefer it to a bit.
It seems to me that many people object to putting bits in horses’ mouths, and these people believe that applying pressure to the horses’ noses is more humane. I disagree, as the tongue is very soft, pliable, durable tissue, and the nose is hard, bony, and thin-skinned. I have seen many different horses respond in various ways to many different kinds of headgear. I do not think that we need to inflict pain on horses in order to force them to do our bidding, and I would hope that no one that rides intends to cause their horses pain. Our equipment is used to communicate with horses in such a way that we can be understood, so that the horse can perform as we wish. It is our responsibility, as riders, to find the most humane and comfortable way to ride each horse.
I have spent a lifetime riding horses and studying horsemanship, and over the years, I have changed my mind many times about what is best for both horses and riders. I see many people discovering through trial and error, and my hope is that in sharing what I have learned, I might save you some time, money, and hardship. It seems that a lot of this information can be delivered in a very dogmatic, rigid manner, and it is difficult to learn when spoken to in this way. I would hope that as students of the horse, we can explore how to to best communicate with our horses with kindness and empathy.
Alma
I see posts from people gentling their mustangs, and I think back to 1999, when I got my first mustang, Alma, who I still have today. She is the best horse I have ever known. I didn't do anything the way we are told to do it, I couldn't, I was 25, and had no resources. When I went to pick her up, I paid my boss 2 days of work to haul her, and when we were loading her, the leather halter broke, and she got loose on the county line, no fencing, nothing, just an unhandled mustang running free in the northern CA hills. Somehow we got her back into her manure filled pen, got a halter on her, and into a trailer--I don't really know how, sheer will, and the fact that the pen was all she knew, so she was terrified out there. To be fair, she had been living in a tiny 10’x20' pipe panel for 2 years, so she was somewhat used to being fed, and was confined.
I rented a house with a 40 acre pasture fenced in barbed wire, so that's where she lived after I brought her home. I turned her loose without a halter, and didn't catch her again for months. I had to bribe her into a small area and feed her grain and sit with her. I did this every day. I finally got a halter on her after discovering that she liked having her udder rubbed. Once I could halter her, I worked with her in the pen, and then the pasture, teaching her to give to pressure/release. I spent months doing this every day, until she would lead and lunge. I still had to briber her into the small pen to catch her. Every day, it took me several hours to get her into the pen, haltered, and then 'train' her. Thankfully, at 25, I had more time. It was all I wanted to do. Once she was leading well, I'd take her on long walks. There were wooden stairs over a barbed wire fence into a park, and she would jump these as she followed me into the park. They were about 3'x3', it was something to see, she jumped from a standstill, like a donkey. We'd cross creeks that we had to swim together, we hiked everywhere.
I had her for a year like this, in my backyard, hiking with her. It still took me almost an hour to catch her in the 40 acre pasture, bribing her into the small pen with grain. I met an accomplished trainer, Pat Parelli's ex-wife, and told her about my mustang that I had for a year, and she laughed at me. "A whole year? Get on!!" I tried to introduce a saddle, but Alma was terrified of the saddle, so I got on bareback. That was fine. I could sit there, but we were both afraid to move. Ray Hunt was still alive then, and he was holding a clinic nearby. I signed up, found a friend with a trailer. It cost me 2 weeks' worth of pay, the best sacrifice I ever made. It took us an hour to get Alma in the trailer. I had to board her at the stable for the clinic, she was terrified to be there, but easier to catch in her stall . After 5 days with Ray, I could saddle and ride her. I never stopped.
When people ask me how, I never know what to say. You have to start with love, and drive, and determination, and then you have to be willing to try things, take risks, and learn, and push yourself. You have to be humble enough to adapt when it doesn't work out right. You have to be kind, and compassionate. I spent so many hours crying in a field...you have to really want it. And, it helps to get good help. I have started hundreds of horses since then. I would laugh at anyone trying do do what I did. But I did it.

Argentina
When I was 21, I ran away from school and became a cowgirl for a few years. My seasonal jobs at dude ranches let me go in the winters, and since I hate to be cold, and all I ever wanted to do was ride, I decided to go south to Argentina one January. After a night in Buenos Aires, where I found my language skills lacking and the city’s congestion overwhelming, I took a bus across the pampas to gaucho country, on the continental divide.
The view out the window was like something through the looking glass, the landscape was familiar and yet completely different. There were flocks of green parrots instead of ravens, rheas instead of mule deer, foliage that fit the same niches as those up north, but were completely unrecognizable species of trees and plants. The stars were in different places in the sky.
My colloquial Mexican language skills served me far better in rural Argentina than in the city. I wrote “Wrangler” as my occupation at the hotel check-in, which confused my host, but when he discovered that I worked horseback with tourists in the western U.S., he invited me to visit his estancia.
I didn’t have transportation to the remote location, but the retired US marine that overheard our exchange was on an intercontinental motorcycle adventure, and offered to take me there the next day. We enjoyed a lovely dinner and conversation, went to our respective bedrooms, and met up in the morning. I ended up on the back of his touring bike, sans helmet, cruising over dirt roads at the base of the Andes. We found the estancia after more than an hour on the road, and the gauchos who worked there welcomed me with bewilderment. I was to stay in an unfinished hotel room, the plumbing was incomplete, but there was cold water to the bathtub, albeit without fixtures. There was a mattress without bedding, but I had a sleeping bag. Best of all, there was a breeding Criollo stud and his progeny, really fine Argentine horseflesh. My new friend was anxious about leaving me there, but I reassured him and he went on his way, promising to return for me in a week.
In the morning, I was given a nice horse and left to ride anywhere I wanted. I explored the estancia and marveled at the oddly familiar but different flora and fauna. At lunch, the gauchos shot a steer and spent the afternoon roasting it on an open fire. We sat around and enjoyed the choice pieces of the animal, which in Argentina are all the fattiest parts, like the throat. I felt self conscious about how I just had to keep chewing forever. How did they eat this stuff?
The next day, when I got back from my morning ride, the gaucho who seemed to be in charge told me to get my sleeping bag so we could go out overnight. I got my saddle set up with my sleeping bag and a bottle of water, and there were ten other gauchos setting off with us. They saw my camera, and insisted on a group photo. I had no idea where we were going, but I was excited to be on an adventure. I could stumble through rudimentary conversations with my host, but could not follow their conversations with each other at all. I was just thrilled to be horseback and out in the wide open new landscape.
The sun began to set, and I realized that it was possible that I’d made a foolhardy decision, riding off into the wilderness with ten strange men, whose language and culture were foreign to me, without any sure way of anyone ever finding me. This was long before cell phones existed, and we were miles and hours away from a landline. My new ex-marine buddy and I didn’t know each other’s full names. I guess he could have followed up with my passport information at the hotel if I’d disappeared. But that was a long shot, and not something I’d expect of a total stranger. I decided not to worry about any of this, I was experiencing something extraordinary. I didn’t actually feel fearful, I just reasoned that other people might, if they found themselves in the same situation.
That night, we stopped at a puesto, an outpost, deep in the grasslands at the base of the Andes. The shack was built of wood around a stone chimney, with a dirt floor. Someone slaughtered a goat, which roasted on our fire in the natural stone fireplace. We shared some soup, bread, goat meat, and the ubiquitous cartons of red wine. Gauchos eat with their hands, using their knives to cut the meat. A gaucho’s knife is critical, he never parts with it. It’s his only tool, and it keeps him alive. He kills with it, eats with it, makes and repairs his tack, trims his horses’ feet, he would be nothing without his knife. My host gave me his knife to eat with. I had the only cup, everyone else drank out of the box. I was given the only spoon, everyone else drank their soup out of their bowls. All the gauchos slept on their saddle blankets, except my host, who gave me his so I would have double padding.
I was awakened in the dark, I stepped outside to a breaking dawn, silhouetting the horses against the blushing sky. My horse was tied, saddled, waiting for me. We set off as a group. As the sun breached the horizon, my host rode next to me to point out a rhea running in the distance.
We rode all through the long, hot summer day, gathering cattle across the wide country. Mid afternoon, we reached some corrals and another puesto, and we stopped for siesta. We had maté and goat meat and bread, and lay in the dark on the dusty earthen floor until the midday heat had passed. Then we gathered of the several hundred head of cattle and headed home. It was dark when we returned, my host helped me put up my horse, and said goodnight. I enjoyed my cold sponge bath and fell into bed.
I hung around and rode for a few more days before the ex-marine showed up on his bike to take me back to town. I still have a picture of the crew from the day we left on our overnight ride, all ten or so men, and me, lined up on our horses. Every now and then, one of them would ask me, “Donde esta su esposo?” (Where is your husband?), and I would say, “He is at home, he doesn’t like horses.” (I had no esposo at the time). Those gauchos couldn’t fathom where I’d come from, what my life was like, or why I had come all that way to work with them. There was nothing appealing or threatening about me, I was a stranger to them. They gave me the courtesy they would offer any guest.